Building a deck – From start to finish
Ever wondered what the process is going to be for your project?
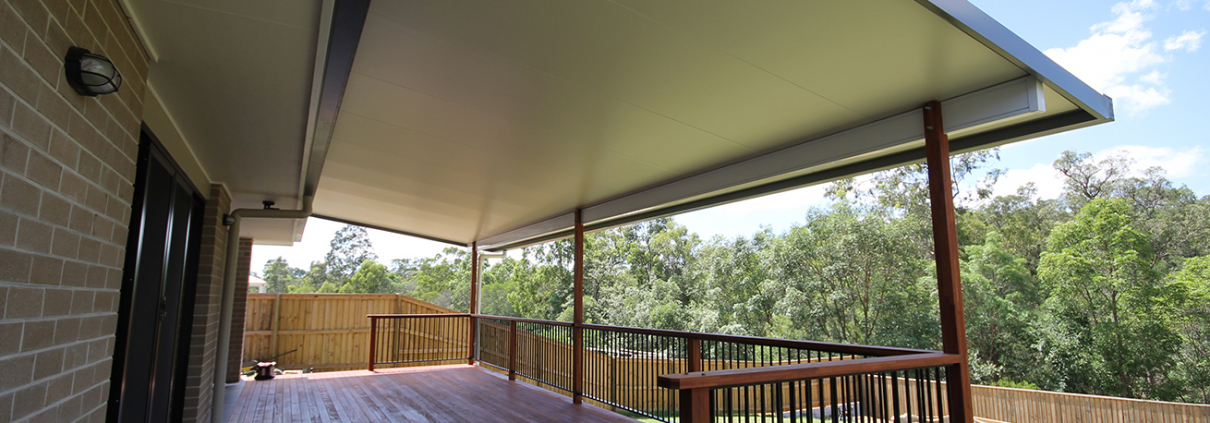
Here is an example of a deck we built recently for a client; the following is an explanation of the entire process from start to finish.
Debbie called and asked if we could come over and have a look at a project she had in mind, which was to build a deck over her existing garage. I turned up and met Debbie’s family and we talked about what she would like to do and what was possible, keeping in mind that we were working with an existing structure and of course keeping within the current building regulations. After drilling a few small pilot holes in her wall to see if it could withstand holding up the new deck and checking that we could get a good amount of head room, I worked out a design and a price that Debbie was happy with. After about a week and a half we had all the local authority permits and were ready to put materials and staff on site.
We started the project by pulling the tiles off the existing roof and demolishing the pine rafters, this left us a good clear space to start building. We then put up a pole plate to hold the joists at the house side and proceeded to install the joists and bearer. For this project we decided to go with LOSP treated LVL’s, while I don’t usually use these on a deck due to their poor weather qualities they were chosen as the deck is fully waterproofed for tiles and they are a lot easier to install than a traditional hardwood joist. I also chose to use a larger than necessary joist as this takes out any potential bounce in the deck and will stop tiles from cracking.
As we had limited head room we had to check out the joists over the pole plate, this does cut down on some of the strength of the joist so we also installed a joist hanger on each one to support it. A new bearer was also installed and put up with temporary props until the new hot dipped galvanised posts arrive, which are eventually put in to large concrete footings.
Martin then sealed all the joists in all the appropriate places, such as where a row of noggins are going to support the flooring and also at the ends of the joists where they can potentially get wet during a storm. We then started to lay the flooring, we decided to use a hardies product made out of compressed fibro board, this is both glued and screwed down and also has a 6mm gap between each sheet. This is so we can put a flexible joint in to help stop any tiles from cracking due to movement. Once the floor has been laid we then tape all the edges to get a nice clean line when installing the flexible joint, which is polyester filler.
After the floor has been finished holes need to be cut out to support all of the posts for the roof and handrails, these holes will eventually get the same flexible joint put around them too. To install these solid Kwila posts each one gets two 12mm bolts to connect it to the bearer and also have all their joining surfaces primed and sealed. Once the posts are all up the handrails are installed as well as the roof beam, these are all made from solid hardwood as this stuff lasts forever.
Now it’s time to put the roof up! Debbie went for a fully insulated roof and it couldn’t have been a better choice for the area, since we had such limited room we flashed under the existing roof to gain as much height as possible. After the roof sheeting was up and finished it was time to install the balustrade, which in this case is stainless steel wire. You have to be a bit careful with wire balustrade as there are a lot of regulations you need to be up to date with to be able to do it legally. Each wire is installed and tightened, which can be done in the future too in case they every come loose, and they are also supported at very short intervals. Once this is finished its time to install the flashings, gutters and fascias on to the roof to finish it off. We put a flashing under the tiles on the roof to ensure Debbie had no leaks back in to her house.
The next job is to install a pair of French doors, an opening was enlarged from an existing window and a new header was installed, this supports the house roof. The doors come pre hinged and fitted with all the locks and handles which makes this a very easy job for us. Architraves and beading is put around the edges of the door to finish it off and the installation of the doors is now complete.
The final job for Debbie’s wonderful new deck in Brisbane is the tilling, he arrives and puts down a waterproof membrane on the entire floor area, he starts to lay the tiles and when he’s done he uses a flexible grout and places a flexible joint against the house, as well as a drip line at the front.
The deck is now complete and Debbie and her family can put their new furniture on it!
– Gordon


